Autocad 2018 Draw Circle Relative to Shape
Circles and Ellipse command
Circles
The circles are widely used in design and drawings.
The circle command is used to draw a circle by specifying the center point and radius.
Permit'due south understand by two examples.
Instance 1:
The steps to create a circle are given beneath:
- Click on the Circle icon on the Ribbon Panel, as shown in the below image:

OR
Type Circumvolve or C on the command line and press Enter. - Specify the center point of a circle on the workspace or viewport.
- Specify the radius of the circle.
Or
To specify bore, blazon D - press Enter - specify the bore of the circle. - Press Enter.
Example 2:
We can also create the circle randomly. The steps are listed below:
- Click on the Circle icon on the Ribbon Panel, equally shown in the below image:

OR
Type Circumvolve or C on the command line and press Enter. - Specify the eye point of a circle on the workspace or viewport.
- Specify the endpoint of the radius through the cursor.
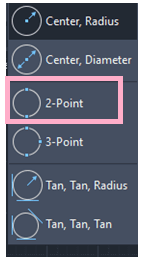
Types of Circles
At that place are three types of circles, which are listed below:
- 2 point circumvolve
- 3 point circle
- Tangent circle
1) two Point circle
We can create a circle by specifying the two endpoints.
The altitude betwixt the two specified endpoints will be considered as the diameter of that circle.
Let's empathize with an example.
Example: A circle between ii lines.
The steps to create a two-bespeak circle are listed below:
- Select the 2-Bespeak circumvolve choice from the drop-downwards list of the circle, as shown in the below epitome:
Or
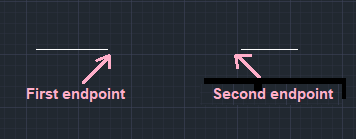
Type C or Circle on the command line - Press Enter- type 2P - printing Enter. - Click on the first endpoint of a circle diameter. We can also blazon the value to specify the endpoint.
- Click on the 2nd endpoint of a circle bore through the cursor, as shown in the below epitome:
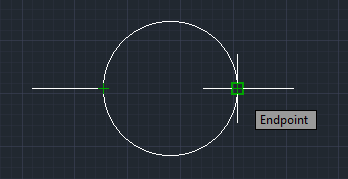
We tin can specify the endpoints according to the requirements. - The circle volition be created, as shown in the beneath paradigm:
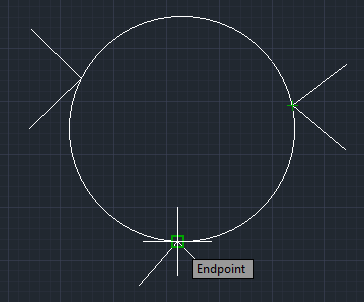
2) three Signal circle
We can create a circle past specifying the three endpoints.
Let'due south understand with an example.
Case: A circle betwixt three edges.
The steps to create a three-bespeak circle are listed below:
- Create three edges.
- Select the 3-Signal circle selection from the drop-down list of the circle, as shown in the below image:

Or
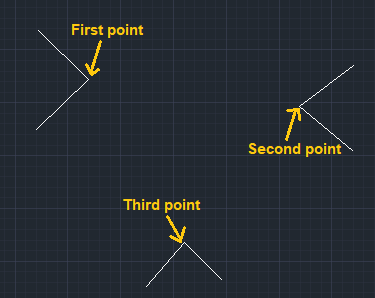
Type C or Circle on the command line - Press Enter- type 3P - press Enter. - Click on the showtime point.
- Click on the second point.
- Click on the third point.
The three points are shown in the below prototype:
- The circle volition exist drawn, equally shown in the below image:
Tangent circle
The tangent circle command is used to draw circles on the tangent.
There are two types of the tangent circle, that appear on the drop-downward listing of the circle icon on the ribbon panel, every bit shown in the below prototype:
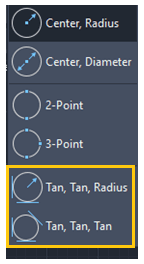
Let's understand with three examples.
Instance i: Tan, Tan, Radius
The steps to create a Ttr (Tangent tangent radius) circle are listed below:
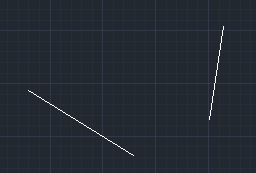
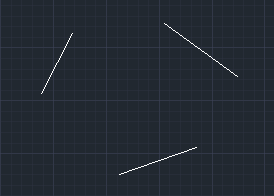
- Draw two lines in the viewport, as shown in the beneath epitome:
- Select the Tan, Tan, Radius circle pick from the drop-down list of the circle on the ribbon console.
Or
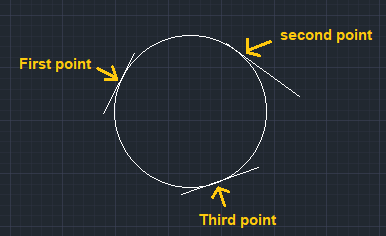
Type C or Circle on the control line - Press Enter- type ttr - press Enter. - Click on the offset point on the first tangent.
- Click on the second point on the other tangent.
- Specify the radius of the circle. For example, 4.
- The circumvolve will exist drawn on the two tangents, as shown in the below image:
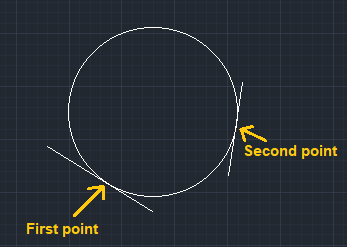
The circle will be adapted according to the specified radius.
Instance ii: Tan, Tan, Tan
The steps to create a (Tangent tangent tangent) circle are listed below:
- Describe three lines on the viewport, as shown in the beneath epitome:
- Select the Tan, Tan, Tan circumvolve pick from the drib-downwards list of the circle.
- Click on the get-go point on the start tangent.
- Click on the 2nd point on the second tangent.
- Click on the tertiary point on the third tangent.
- The circle will be drawn on the three tangents, equally shown in the beneath image:
We can modify the tangent and points according to the requirements.
Instance 3: Tan, Tan, Radius
To create a circle inside a triangle
The steps to create a circle inside a triangle are listed below:
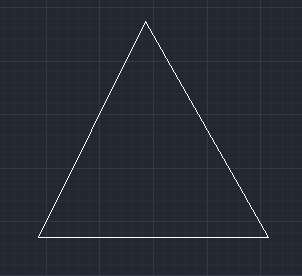
- Draw a triangle in the viewport, as shown in the below image:
- Select the Tan, Tan, Radius circumvolve option from the drop-downwards listing of the circumvolve. Or
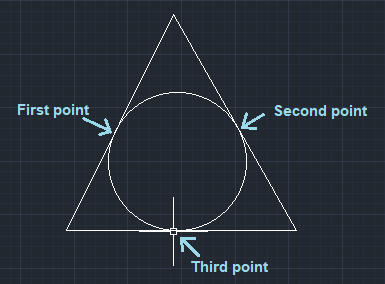
Blazon C or Circle on the control line - Printing Enter- type ttr - press Enter. - Click on the first signal on one side of the triangle.
- Click on the second and tertiary points on the other side of the triangle.
- The circle will exist drawn inside the circle, as shown in the below epitome:
Source: https://www.javatpoint.com/autocad-circles-and-ellipse-command
0 Response to "Autocad 2018 Draw Circle Relative to Shape"
Postar um comentário